How To Create a Video Intro on the iPhone Using Text Part 1 of 3
How To Create a Video Intro on the iPhone Using Text Part 1 is a Tutorial on creating animated text as a GIF or video to add to other video projects or social media accounts.
This is a 3-Part Series – links will be added when the next 2 videos are ready.
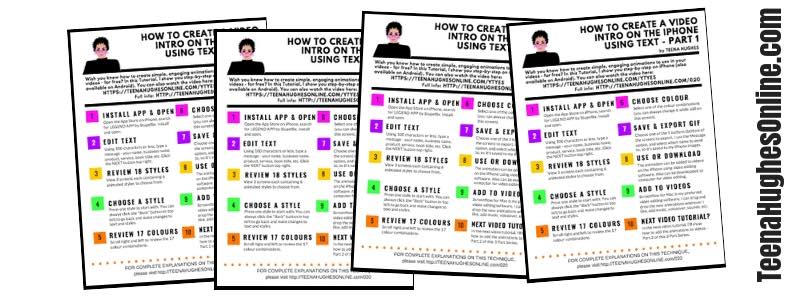
Would you like a copy of the Step-by-Step Checklist on how to create a video intro with text?
Would you like to know how to create an animated intro on your iPhone so you can improve your videos before uploading to the Internet?
Hi, this is Teena Hughes of TeenaHughesOnline.com, and in this video I’m going to teach you how to use an app to make quick animations with text, images, and video backgrounds.
Keep watching until the end where I’m going to share my Checklist to help you create your own.
Now, the idea is to keep the intro short, 5 to 10 seconds if we’re just sharing your name or your business name, or your product or service, etcetera.
Once this intro is created, I can use it by :
- adding it to a longer video
- or using it on social media
- in blogs
- newsletters, etcetera.
Let’s get started!
On your iPhone go to the APP store, and we’re going to be looking for an APP called:
- Legend [l e g e n d] by Stupeflix
I’ve already installed the APP so :
- I can see an Open button on the top right of the screen. Otherwise you will have to install, so go ahead and install and then open.
- First the splash screen appears and then we get a new screen with some text on it.
- What we’re going to do here is go ahead and type whatever we like.
- It could be our business name, our name, the name of a book that we’re going to have a little intro about – anything that you like here.
I’m going to make up a business name
- it’s going to be (if only I could type) … it’s going to be Fabulous Coffee Cafe
- my fingers seemed to be all thumbs today and I’m going to go ahead and put the area that I’m in (which is Brisbane) as I fix up that typo as well
- and why not also add Australia? And now you know where I am. It’s not a secret anymore! [that made me laugh!]
On the top right of the iPhone screen:
- you can see the word Next, which I just pressed
- and now this is going to take me into the first of three screens showing me options for my text
- now this is really cool. I didn’t have to go and change any fonts or any font sizes
- in here, six items already appear for me to choose from
- now at the bottom of the screen you can see 1, 2, 3 — so I’m going to click on number two, which will take me into the second screen of options
- same thing here — we’ve got another six nice-looking little text areas — ooh I like that one on the right, that round one in the middle
- and we can also go over to the third screen and have a look at those options as well.
Some of them are quite in your face, but that’s okay.
- You just choose whichever one suits your personality for whatever you’re trying to achieve
- and as mentioned, this could be “\:
- your name
- a book name
- it could be a service
- product that you have
- it could be anything at all.
I’m going to go back to the second screen and choose one of these ones in here:
- and now it’s going to appear any second now
- okay, so I quite like this and at the bottom of the screen you can see that there are 17 different colour combos
- by clicking on any of these you can see different shades for the layout, the backgrounds, etcetera.
I’ve clicked on the pink one.
- Oh, that looks okay! Not too sure about the dots In the background
- I’ll go ahead now and choose the yellow one, which also includes the pink
- now you just have to work out which colour combination works for you
- and then the blue one
- and then I’ll scroll the screen at the bottom and I’ll choose this watermelon colour which is quite nice.
And while I’m here I’m going to choose the green and have a look at that. Oh, I don’t like the green with the watermelon, but that’s okay.
- I’m going to go back and click on the watermelon colour and that will be the one I’m going to run with
Now the next thing I need to do is save it and send it
So what I’m going to do here is :
- go down to the bottom of the screen where you can see five options:
- Messages
- Gif
- and More.
Now I’ve tried the Messages and the Gif options:
- the Gif option sends it to an email, which I quite like
- and the Message option sends it to your text messages.
So I’m going to go ahead and click on the Gif option
- you’ll notice just above the coloured boxes there, that is a yellow bar running across the screen
- this is saving the file for me and we’re done
- now we’ll get an opportunity to type in my email name and I’m going to use my gmail so you can see different options on the screen where you can send it
- I’m just looking for the gmail icon
- and then I’m going to click on that once with my finger.
Now I can click the send button after I’ve typed my subject.
And it’s now winging its way to my email inbox!
All I have to do now is open up the email and then download the animation to my computer
- I can then add it into any project that I like
- or I could also have just sent it via text message and then use it on my iPhone to send to people
- I could also add it to a video editing software app on my iPhone (or Android) and add extra footage or animations.
In the next video, I’m going to show you how to add a video background, which is also very cool.
Thanks so much for watching my tutorial! I hope it was easy to follow.
And don’t forget to grab my step-by-step Checklist on how to create a video intro on the iPhone. It’s a PDF and there’s a link below (and in the Youtube Description) where you can download it entirely free.
If you like this video, please don’t be shy:
- pop over to Youtube and hit the Like button
- click the bell to be reminded of my new videos
- share it with your friends
- and be sure to subscribe.
Thanks so much for watching! I’ll see you in the next video.
This is ciao ciao for now from Teena Hughes of TeenaHughesOnline.com — Bye Bye!
Would you like a copy of the Step-by-Step Checklist?
[email-download-link namefield=”YES” group=”Video”]
View more Checklists and Cheatsheets >>
Have you found a simple way to create animations for your videos? Please do share — I’d love to see what you’ve achieved – thanks in advance!
I’m looking forward to hearing from you – feel free to post a Comment below, send me an email, or pop over to the Facebook page where I post regular updates.
Not on my mailing list yet?
Sign up to be notified of new video tips, techniques, tools and tutorials! Grab your free copy of my Youtube Cheatsheet to get you started on making sure your Youtube Channel is working for you, rather than fading into the background. Simple steps you can take today to give the Channel some well-deserved TLC (tender loving care)!